Oracle Physical Standby Dataguard in 11g | Karan Rajpoot
Required Parameters to configure the Dataguard setup:-
DB_NAME= It should be the same on the primary and standby side.
DB_UNIQUE_NAME= Must be different on the primary and dr side.
LOG_ARCHIVE_CONFIG= This parameter includes db_unique_name which is the part of data guard configuration.
LOG_ARCHIVE_DEST_n= It defines the local and remote archive log file location.
LOG_ARCHIVE_DEST_STATE_n= It defines the state of archiving (enable or differ).
REMOTE_LOGIN_PASSWORDFILE= it should be in EXCLUSIVE mode.
FAL_SERVER= Use for archive log gap resolution (required only in physical standby server).
DB_FILE_NAME_CONVERT= It is required when directory structure is needed to be in the different datafile.
LOG_FILE_NAME_CONVERT= It is required when directory structure is needed to be in the different logfile.
STANDBY_FILE_MANAGEMENT= It helps to create the file automatically on the standby server.
In this demonstration, I am using the below names of primary and standby databases.
priamry DB_NAME=prod
primary DB_UNIQUE_NAME=prod
standby DB_NAME=prod
standby DB_UNIQUE_NAME=dr
Now let's start the configuration.
Primary Server Configuration: -
Step 1) On the primary server, check the archive mode of the database, It should be in archive log mode.
SQL> archive log list;
Database log mode Archive Mode
Automatic archival Enabled
Archive destination USE_DB_RECOVERY_FILE_DEST
Oldest online log sequence 80
Next log sequence to archive 82
Current log sequence 82
Note: - I can see from the above output, my database is in archive log mode. If it is not in archive mode then we need to change manually through the below steps.
Step to change database mode from NoArchive to Archive.
shutdown the database
start the database in mount stage
alter database archive log
alter database open
Step 2) Now check the logging mode of the database, It should be force_logging mode.
SQL> select force_logging from v$database;
FOR
---
YES
Step 3) Now check the db_name and db_unique_name of the primary server.
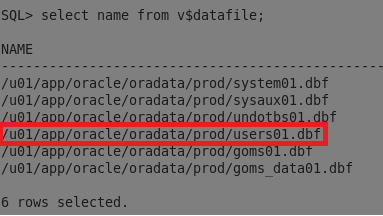
SQL> select name from v$database;
NAME
---------
PROD
SQL> select db_unique_name from v$database;
DB_UNIQUE_NAME
------------------------------
prod
Step 4) Now make the db_unique_name to be the part of the data guard configuration using below command.
SQL> alter system set log_archive_config='DG_CONFIG=(prod,dr)' ;
System altered.
Step 5) Now set the archivelog destinations.
SQL> alter system set log_archive_dest_2='service=dr lgwr sync affirm valid_for=(online_logfiles,primary_role) db_unique_name=dr';
System altered.
SQL> alter system set log_archive_dest_state_2=enable;
System altered.
Step 6) Now set remote login password to exclusive.
SQL> alter system set remote_login_passwordfile=exclusive scope=spfile;
System altered.
Step 7) Now set falserver and file name convert parameters.
SQL> alter system set fal_server=dr;
System altered.
SQL> alter system set db_file_name_convert='prod','dr' scope=spfile;
System altered.
SQL> alter system set log_file_name_convert='prod','dr' scope=spfile;
System altered.
SQL> alter system set standby_file_management=auto;
System altered.
Step 8) Now Configure the listener and tnsnames entries on the primary server.
Listener file Output: -
[oracle@prod admin]$ cat listener.ora
# listener.ora Network Configuration File: /u01/app/oracle/product/11.2.0/db_1/network/admin/listener.ora
# Generated by Oracle configuration tools.
LISTENER =
(DESCRIPTION_LIST =
(DESCRIPTION =
(ADDRESS = (PROTOCOL = IPC)(KEY = EXTPROC1521))
(ADDRESS = (PROTOCOL = TCP)(HOST = prod.radical.com)(PORT = 1521))
)
)
ADR_BASE_LISTENER = /u01/app/oracle
SID_LIST_LISTENER=
(SID_LIST=
(SID_DESC=
(GLOBAL_DBNAME=prod)
(SID_NAME=prod)
(ORACLE_HOME=/u01/app/oracle/product/11.2.0/db_1)
(PRESPAWN_MAX=20)
(PRESPAWN_LIST=
(PRESPAWN_DESC=(PROTOCOL=tcp)(POOL_SIZE=2)(TIMEOUT=1))
)
)
)
SID_LIST_LISTENER=
(SID_LIST=
(SID_DESC=
(GLOBAL_DBNAME=dr)
(SID_NAME=dr)
(ORACLE_HOME=/u01/app/oracle/product/11.2.0/db_1)
(PRESPAWN_MAX=20)
(PRESPAWN_LIST=
(PRESPAWN_DESC=(PROTOCOL=tcp)(POOL_SIZE=2)(TIMEOUT=1))
)
)
)
tnsnames file output: -
[oracle@prod admin]$ cat tnsnames.ora
# tnsnames.ora Network Configuration File: /u01/app/oracle/product/11.2.0/db_1/network/admin/tnsnames.ora
# Generated by Oracle configuration tools.
PROD =
(DESCRIPTION =
(ADDRESS_LIST =
(ADDRESS = (PROTOCOL = TCP)(HOST = 192.168.2.20)(PORT = 1521))
)
(CONNECT_DATA =
(SERVICE_NAME = prod)
)
)
DR =
(DESCRIPTION =
(ADDRESS_LIST =
(ADDRESS = (PROTOCOL = TCP)(HOST = 192.168.2.21)(PORT = 1521))
)
(CONNECT_DATA =
(SERVICE_NAME = dr)
)
)
Step 9) Now take a backup of the primary database using RMAN utility.
Command: - backup database plus archivelog;
Step 10) Now we need to create the standby control file and pfile.
SQL> alter database create standby controlfile as '/tmp/drcontrol.ctl';
Database altered.
SQL> create pfile='/tmp/initdr.ora' from spfile;
File created.
Note: - After creating the pfile, we need to modify the pfile and create the necessary directory as per the requirement on the standby server.
Below are some mandatory changes which required on the standby server.
1) change db_unique_name
2) change fal_server
3) change log_archive_dest_n
4) Make a directory on the standby server like adump, controlfile path directory, flash recovery directory.
Step 11) Now we need to copy backup set, archivelog, pfile, standby controlfile and password file to standby database.
Control File: -
[oracle@prod admin]$ scp /tmp/drcontrol.ctl oracle@192.168.2.21:/u01/app/oracle/oradata/dr/control01.ctl
oracle@192.168.2.21's password:
drcontrol.ctl 100% 9808KB 9.6MB/s 00:00
Now copy the content of control01.ctl control file to other control files to make it sync on the standby server.
[oracle@dr ~]$ cp /u01/app/oracle/oradata/dr/control01.ctl /u01/app/oracle/oradata/dr/control03.ctl
[oracle@dr ~]$ cp /u01/app/oracle/oradata/dr/control01.ctl /u01/app/oracle/oradata/dr/control04.ctl
Backup set and archivelog: -
[oracle@prod admin]$ scp -r /u01/app/oracle/fast_recovery_area/PROD oracle@192.168.2.21:/u01/app/oracle/fast_recovery_area/
oracle@192.168.2.21's password:
o1_mf_nnndf_TAG20190303T113247_g7pvj845_.bkp 100% 1131MB 7.3MB/s 02:34
o1_mf_annnn_TAG20190303T113231_g7pvhrb8_.bkp 100% 152MB 4.8MB/s 00:32
o1_mf_annnn_TAG20190303T113503_g7pvnj52_.bkp 100% 75KB 75.0KB/s 00:00
o1_mf_annnn_TAG20190209T004745_g5vogs7v_.bkp 100% 257KB 257.0KB/s 00:00
o1_mf_nnndf_TAG20190217T001807_g6jpq8g4_.bkp 100% 1107MB 10.1MB/s 01:50
o1_mf_annnn_TAG20190217T002003_g6jptvqd_.bkp 100% 68KB 68.0KB/s 00:00
o1_mf_annnn_TAG20190217T001730_g6jpp3vm_.bkp 100% 436MB 9.9MB/s 00:44
o1_mf_s_1001936105_g7pvnm0t_.bkp 100% 9888KB 9.7MB/s 00:01
o1_mf_s_999737268_g5vogwod_.bkp 100% 9888KB 9.7MB/s 00:01
o1_mf_s_1000426805_g6jptydc_.bkp 100% 9888KB 9.7MB/s 00:00
o1_mf_1_72_g6joh1l9_.arc 100% 5424KB 5.3MB/s 00:00
o1_mf_1_78_g75mzbxx_.arc 100% 25MB 12.3MB/s 00:02
o1_mf_1_79_g75n35b3_.arc 100% 1113KB 1.1MB/s 00:00
o1_mf_1_82_g7pvhog5_.arc 100% 6757KB 6.6MB/s 00:01
o1_mf_1_80_g7ps5p8d_.arc 100% 39MB 19.5MB/s 00:02
o1_mf_1_83_g7pvnhm2_.arc 100% 74KB 73.5KB/s 00:00
o1_mf_1_81_g7psbblo_.arc 100% 44MB 14.5MB/s 00:03
o1_mf_1_73_g6jpcf8l_.arc 100% 2745KB 2.7MB/s 00:01
o1_mf_1_75_g6jpp0tq_.arc 100% 247KB 247.0KB/s 00:00
o1_mf_1_74_g6jpgdgg_.arc 100% 582KB 582.0KB/s 00:00
o1_mf_1_76_g6jptvb3_.arc 100% 67KB 66.5KB/s 00:00
o1_mf_1_77_g6lvmgrz_.arc 100% 28MB 4.7MB/s 00:06
parameter file: -
[oracle@prod admin]$ scp /tmp/initdr.ora oracle@192.168.2.21:/tmp/initdr.ora
oracle@192.168.2.21's password:
initdr.ora 100% 1261 1.2KB/s 00:00
Remote login password file: -
[oracle@prod admin]$ scp /u01/app/oracle/product/11.2.0/db_1/dbs/orapwprod oracle@192.168.2.21:/u01/app/oracle/product/11.2.0/db_1/dbs/
oracle@192.168.2.21's password:
orapwprod 100% 1536 1.5KB/s 00:00
Note: - We need to change the password file from orapwprod to orapwdr on the standby server.
Log in to the standby server and go to the ORACLE_HOME/dbs location and run the below command.
mv orapwprod orapwdr
Physical Standby Server Configuration: -
Step 12) Now create the listener and tnsnames entry for standby database as well and update /etc/oratab file.
[oracle@dr admin]$ cat /etc/oratab
# This file is used by ORACLE utilities. It is created by root.sh
# and updated by either the Database Configuration Assistant while creating
# a database or ASM Configuration Assistant while creating an ASM instance.
# A colon, ':', is used as the field terminator. A new line terminates
# the entry. Lines beginning with a pound sign, '#', are comments.
#
# Entries are of the form:
# $ORACLE_SID:$ORACLE_HOME:<N|Y>:
#
# The first and second fields are the system identifier and home
# directory of the database respectively. The third filed indicates
# to the dbstart utility that the database should, "Y", or should not,
# "N", be brought up at system boot time.
#
# Multiple entries with the same $ORACLE_SID are not allowed.
#
dr:/u01/app/oracle/product/11.2.0/db_1:N
Step 13) Now create spfile from the pfile file which we were transferred from primary to the standby server.
SQL> create spfile from pfile='/tmp/initdr.ora';
File created.
Step 14) Now restore the backup file on the standby server using RMAN utility.
[oracle@dr admin]$ rman target /
Recovery Manager: Release 11.2.0.4.0 - Production on Sun Mar 3 12:34:00 2019
Copyright (c) 1982, 2011, Oracle and/or its affiliates. All rights reserved.
connected to target database (not started)
RMAN> startup mount;
Oracle instance started
database mounted
Total System Global Area 839282688 bytes
Fixed Size 2257880 bytes
Variable Size 545262632 bytes
Database Buffers 289406976 bytes
Redo Buffers 2355200 bytes
RMAN> restore database;
Starting restore at 03-MAR-19
Starting implicit crosscheck backup at 03-MAR-19
using target database control file instead of recovery catalog
allocated channel: ORA_DISK_1
channel ORA_DISK_1: SID=28 device type=DISK
Crosschecked 10 objects
Finished implicit crosscheck backup at 03-MAR-19
Starting implicit crosscheck copy at 03-MAR-19
using channel ORA_DISK_1
Crosschecked 6 objects
Finished implicit crosscheck copy at 03-MAR-19
searching for all files in the recovery area
cataloging files...
no files cataloged
using channel ORA_DISK_1
channel ORA_DISK_1: starting datafile backup set restore
channel ORA_DISK_1: specifying datafile(s) to restore from backup set
channel ORA_DISK_1: restoring datafile 00001 to /u01/app/oracle/oradata/dr/system01.dbf
channel ORA_DISK_1: restoring datafile 00002 to /u01/app/oracle/oradata/dr/sysaux01.dbf
channel ORA_DISK_1: restoring datafile 00003 to /u01/app/oracle/oradata/dr/undotbs01.dbf
channel ORA_DISK_1: restoring datafile 00004 to /u01/app/oracle/oradata/dr/users01.dbf
channel ORA_DISK_1: restoring datafile 00005 to /u01/app/oracle/oradata/dr/goms01.dbf
channel ORA_DISK_1: restoring datafile 00006 to /u01/app/oracle/oradata/dr/goms_data01.dbf
channel ORA_DISK_1: restoring datafile 00007 to /u01/app/oracle/oradata/dr/users03.dbf
channel ORA_DISK_1: restoring datafile 00008 to /u01/app/oracle/oradata/dr/recovery_catalog.dbf
channel ORA_DISK_1: reading from backup piece /u01/app/oracle/fast_recovery_area/PROD/backupset/2019_03_03/o1_mf_nnndf_TAG20190303T113247_g7pvj845_.bkp
channel ORA_DISK_1: piece handle=/u01/app/oracle/fast_recovery_area/PROD/backupset/2019_03_03/o1_mf_nnndf_TAG20190303T113247_g7pvj845_.bkp tag=TAG20190303T113247
channel ORA_DISK_1: restored backup piece 1
channel ORA_DISK_1: restore complete, elapsed time: 00:02:20
Finished restore at 03-MAR-19
Step 15) Now we can create standby redo log file on both the side to transfer the archive from primary to standby server using the current log file.
Make sure you will create standby redo log file as same size as online redo log file.
Standby side: -
alter database add standby logfile
('/u01/app/oracle/oradata/dr/standby_redo01.log') size 50M;
alter database add standby logfile
('/u01/app/oracle/oradata/dr/standby_redo02.log') size 50M;
alter database add standby logfile
('/u01/app/oracle/oradata/dr/standby_redo03.log') size 50M;
alter database add standby logfile
('/u01/app/oracle/oradata/dr/standby_redo04.log') size 50M;
Primary Side: -
alter database add standby logfile
('/u01/app/oracle/oradata/prod/standby_redo01.log') size 50M;
alter database add standby logfile
('/u01/app/oracle/oradata/prod/standby_redo02.log') size 50M;
alter database add standby logfile
('/u01/app/oracle/oradata/prod/standby_redo03.log') size 50M;
alter database add standby logfile
('/u01/app/oracle/oradata/prod/standby_redo04.log') size 50M;
Step 16) Now start the redo apply process om standby server using below command.
SQL> alter database recover managed standby database disconnect from session;
Database altered.
[oracle@dr admin]$ ps -ef | grep mrp
oracle 4622 1 4 12:47 ? 00:00:00 ora_mrp0_dr
oracle 4628 3613 0 12:47 pts/0 00:00:00 grep mrp
Step 17) Now on the primary server check the latest archive log and force a log switch.
SQL> alter system switch logfile;
System altered.
SQL> archive log list;
Database log mode Archive Mode
Automatic archival Enabled
Archive destination USE_DB_RECOVERY_FILE_DEST
Oldest online log sequence 85
Next log sequence to archive 87
Current log sequence 87
Now on the physical standby server check the latest archive log has been applied or not.
SQL> select sequence#, first_time,next_time, applied from v$archived_log ORDER BY sequence#;
SEQUENCE# FIRST_TIME NEXT_TIME APPLIED
---------- -------------------- -------------------- ---------
83 03-MAR-2019 11:32:29 03-MAR-2019 11:35:03 YES
84 03-MAR-2019 11:35:03 03-MAR-2019 12:34:21 YES
85 03-MAR-2019 12:34:21 03-MAR-2019 12:50:06 YES
86 03-MAR-2019 12:50:06 03-MAR-2019 12:50:20 YES
As we can see from the above output, the archive has been applied successfully to the standby server.
Step 18) Now we can check the DB name, DB unique name, role, mode of both the servers.
Primary Server Output: -
SQL> select name,db_unique_name,open_mode, database_role from v$database;
NAME DB_UNIQUE_NAME OPEN_MODE DATABASE_ROLE
--------- ------------------------------ -------------------- ----------------
PROD prod READ WRITE PRIMARY
Standby Server Output: -
SQL> select name,db_unique_name,open_mode, database_role from v$database;
NAME DB_UNIQUE_NAME OPEN_MODE DATABASE_ROLE
--------- ------------------------------ -------------------- ----------------
PROD dr READ ONLY WITH APPLY PHYSICAL STANDBY

Comments
Post a Comment